Learning@Griffith Help in Canvas
We have a brand-new help website for the new LMS Canvas, with access to further support from 24/7 call and chat lines.
Creating Turnitin assignments
How to manually create a Turnitin assignment
Turnitin assignments can be manually created within your course site. To create a Turnitin assignment:
- Navigate to the content folder you would like the assignment to appear in
- Hover over the Assignments tab toward the top of the area, then click Turnitin Direct Assignment
This will open the assignment creation page where you can configure the settings as desired.
How to set up Turnitin assignments after a course copy
If you have performed a course copy and the source (old) course site contained Turnitin assignments, copies of those assignments should be present in the destination (new) course site, provided the correct course copy settings were used. However, these new assignments will not be functional or accessible until a Turnitin recycle process is performed. The Turnitin recycle process establishes a connection between your Learning@Griffith course site and the Turnitin system and separates the new course site from the old one.
What to do before performing a Turnitin recycle
Before performing a Turnitin recycle, please note that the process should:
- only be performed if it is needed
- If you are able to access and edit Turnitin submission points, a recycle may not be required
- only be performed in the destination (new) course site.
- If a recycle is performed in the old course site it will sever the link between the course site and Turnitin and it can be very difficult to recover student work.
- be performed at the start of the teaching period before students start uploading to the first assignment.
- Students may not be able to access a submission point to upload their paper if a recycle has not been performed after a copy.
- If a recycle is performed after students have been able to make submissions in your course site, it will sever the link between the course site and Turnitin and it can be very difficult to recover student work.
How to perform a Turnitin recycle
To perform a Turnitin recycle:
- Navigate to the current/new course site in Learning@Griffith
- Confirm you are in the correct course and not an older offering or the wrong course
- In the left-hand course menu, expand Course Tools, then click Turnitin Direct Tools
- Click the Recycle Turnitin Direct Assignments link or icon
- Click the blue Recycle Turnitin Direct Assignments button
- Wait for the page to reload
If you have any concerns about performing a recycle, please contact the IT Service Centre for assistance.
What to do after a Turnitin recycle
After you have performed a recycle, we strongly recommend you edit each assignment and ensure the settings align with those recommended for Draft submissions or Final submissions. Keep in mind that some important settings, such as the Due Date and Post Date, cannot be checked or changed from the Modify page and must be checked via the Edit Parts area.
Configuring Turnitin assignments
Turnitin assignments can be configured on the assignment creation page or the Modify page. The assignment creation page is shown immediately after you manually create an assignment, while the Modify page can be accessed by clicking the chevron to the right of the assignment title in the assessment folder, then clicking Edit.
How to configure a Turnitin assignment for Draft submissions
Draft submission points are optional and provide students the opportunity to check their similarity score prior to submitting the final version of their paper for marking. The following settings are recommended for all Turnitin assignments set up for Draft submissions, with bold text referencing the most important settings to review.
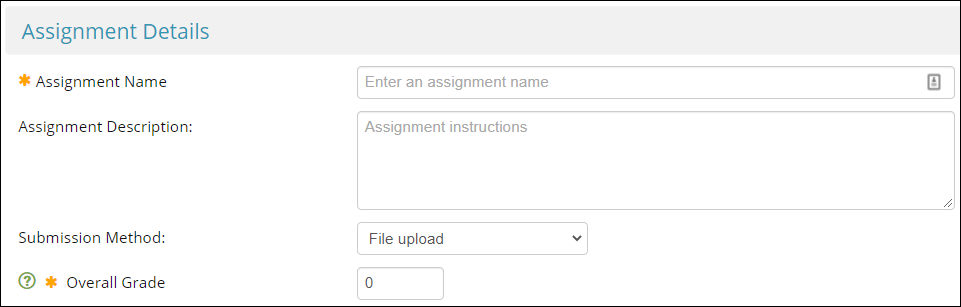
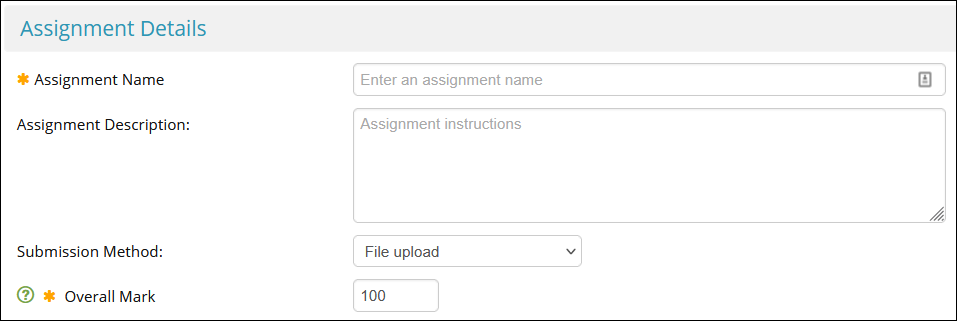
Assignment Details part 1
- Enter an Assignment Name in the box provided
- This will show to students just above the View Assignment link in the content folder
- You may want to include 'DRAFT' somewhere in the title. For example, 'DRAFT Lab Report Submission'.
- Optionally, add an Assignment Description in the box provided
- This will show to students in the expandable description box just after they click View Assignment
- The character limit of this field is 1000
- Set Submission Method to File Upload
- Set the Overall Grade to zero
- There is no need to set this above zero because draft submissions are not marked
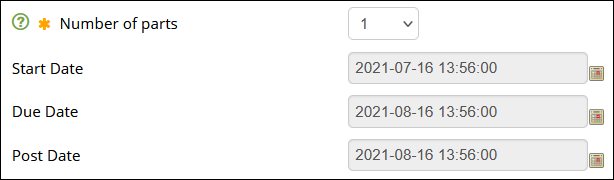
Assignment Details part 2
Please note that these settings are only available on the assignment creation page and not on the Modify page. If you need to change these settings after the assignment has been created, see editing Turnitin assignments.
- Leave Number of Parts set to 1
- Leave the Start Date as the default
- Click the calendar icon and extend the Due Date far enough into the future to allow students with extensions to make draft submissions
- Leave the Post Date as the default
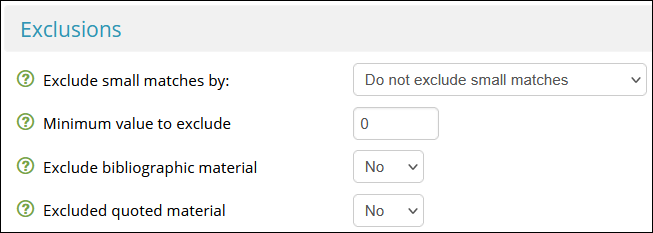
Exclusions
- Set Exclude small Matches by to Do not exclude small matches
- Set Minimum value to exclude to zero
- Set Exclude bibliographic material to No
- Set Exclude quoted material to No
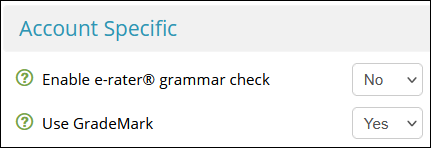
Account Specific
- Set Enable e-rater grammar check to No
- Set Use GradeMark to Yes
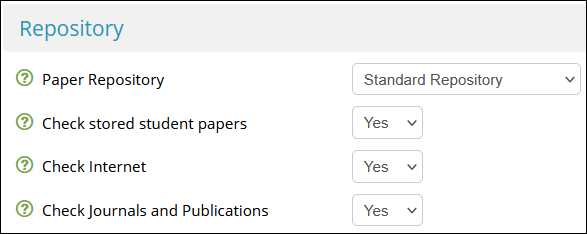
Repository
- Set Paper Repository to No Repository
- This ensures papers uploaded to the draft submission point are not added to the repository against which future submissions are checked for similarity. As such, it mitigates the risk of papers submitted to a final submission point matching with the student's own draft submission.
- Set Check stored student papers to Yes
- Set Check Internet to Yes
- Set Journals and Publications to Yes

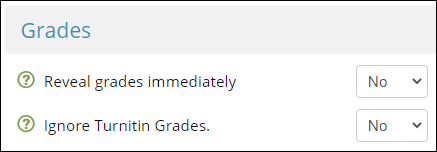
Grades
- Set Reveal Grades Immediately to No
- Set Ignore Turnitin Grades to No
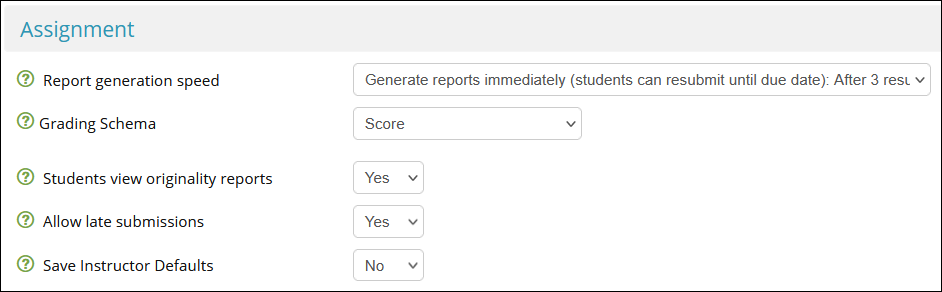
Assignment
- Set Report generation speed to Generate reports immediately (students can resubmit until due date)
- This reduces the risk of originality reports being stuck in 'Pending' and requiring the vendor to take action
- Set Grading Schema to Score
- Set Students view originality reports to Yes
- If this is set to No, students will not be able to view their similarity report
- Set Allow late submissions to Yes
- This reduces the risk of students with extensions being unable to make draft submissions
- Set Save Instructor Defaults to No
Finishing up
When you are ready to create or save the assignment, click the blue Create Assignment or Update Assignment button to save the settings.
How to configure a Turnitin assignment for Final submissions
Final submission points provide students a place to submit the final version of their assignment for marking. The following settings are recommended for all Turnitin assignments set up for Final submissions, with bold text referencing the most important settings to review.
Assignment Details part 1
- Enter an Assignment Name in the box provided
- This will show to students just above the View Assignment link in the content folder
- You may want to include 'FINAL' somewhere in the title. For example, 'FINAL Lab Report Submission'.
- Optionally, add an Assignment Description in the box provided
- This will show to students in the expandable description box just after they click View Assignment
- The character limit of this field is 1000
- Set Submission Method to File Upload
- Set the Overall Grade to match the 'marked out of' value for the assignment in the Course Profile
- This will ensure your Mark Centre is configured correctly for assessment mapping during the Grade Management process.
Assignment Details part 2
Please note that these settings are only available on the assignment creation page and not on the Modify page. If you need to change these settings after the assignment has been created, see editing Turnitin assignments.
- Leave Number of Parts set to 1
- Leave the Start Date as the default
- Click the calendar icon and set the Due Date according to the due date of the assignment
- Set the Post Date far enough into the future to ensure it does not elapse before marking and moderation are finished
- The Post Date controls the release of marks and feedback to students. Setting this well into the future will mitigate the risk of marks and feedback being released to students prematurely. Marks and feedback can then be released by changing the Post Date once marking and moderation are complete.
Exclusions
- Set Exclude small Matches by to Do not exclude small matches
- Set Minimum value to exclude to zero
- Set Exclude bibliographic material to No
- Set Exclude quoted material to No
Account Specific
- Set Enable e-rater grammar check to No
- Set Use GradeMark to Yes
Repository
- Set Paper Repository to Standard Repository
- This ensures submissions are added to the repository against which future submissions are checked for similarity.
- Set Check stored student papers to Yes
- Set Check Internet to Yes
- Set Journals and Publications to Yes
Grades
- Set Reveal Grades Immediately to No
- Set Ignore Turnitin Grades to No
Assignment
- Set Report generation speed to one of the following:
- Generate reports immediately (students can resubmit until due date)
- This option allows students unlimited submissions up until the Due Date set further up the page. This setting can reduce workload on instructors as students can make resubmissions without needing to contact a member of the teaching team for assistance up until the listed Due Date. Students would still need to contact a member of the teaching team for assistance after the listed due date passes.
- Generate reports immediately (students cannot resubmit)
- This option means students only get one attempt to make a submission, regardless of whether the due date has passed or not. If a student submits the wrong file or requires a resubmission for any other reason, they would need to contact a member of the teaching team, even before the due date.
- Generate reports immediately (students can resubmit until due date)
- Set Grading Schema to Score
- This will ensure that marks are passed through to the Mark Centre as numbers and not ticks or letters
- Set Students view originality reports to one of the following
- Yes
- This will allow students to view similarity reports for their final submissions
- No
- This will prevent students from viewing similarity reports for their final submissions
- Yes
- Set Allow late submissions to Yes
- This will ensure students who are submitting late, either with or without an approved extension, can still submit.
- Late submissions are easily identifiable when marking because the timestamp text will be red as opposed to black for on-time submissions
- If you are creating separate submission points for on-time and late submissions, you will most likely want to set this to No for the on-time submission point and Yes for the late submission point.
- Set Save Instructor Defaults to No
Finishing up
When you are ready to create or save the assignment, click the blue Create Assignment or Update Assignment button to save the settings.
Editing Turnitin assignments
Once a Turnitin assignment has been created, you can check and change its settings at any time by accessing the Modify page:
- Navigate to the folder in your course site that contains the assignment
- Click the chevron to the right of the assignment title, then click Edit
The settings can then be amended to match our recommended configuration for Draft submissions or recommended configuration for Final submissions.
Editing FAQs
The Start Date, Due Date and Post Date do not appear on the Modify page. How do I change these settings?
Settings in assignment details part 2 (including the Start Date, Due Date and Post Date) cannot be edited from the Modify page. Instead, they can accessed and amended from the Edit Parts area:
- Navigate to the folder in your course site that contains the assignment
- Click the View Assignment link below the assignment title
- Click the blue Edit Parts button
- Make any required changes
- Click the blue Update Parts button
Using Learning@Griffith site navigation
- Staff Using Learning@Griffith
- Assessment
- Turnitin
- Creating, Configuring and Editing Turnitin Assignments
- Managing Turnitin Submissions
- Turnitin Similarity Report, Marks and Feedback
- Turnitin
- Assessment
Contact us
A-Z of tools
Your answer may be in our list of tools. Make sure you've clicked around this website to see if your question or issue has already been addressed.
Request assistance
- You can log a Service Request with us online, using the IT support form
- Or, you can phone or email us via the IT Service Centre
Learning@Griffith specialist technical support is available Monday to Friday, 9am - 5pm. At other times, IT Service Centre staff may be able to assist you.
Training
The Learning@Griffith Support Team provide technical support for the Learning@Griffith system. Learning Futures works in partnership with Academic and Administrative elements across Griffith to support the attainment of our Learning and Teaching goals. Visit our Training page for more information on accessing services provided by Learning Futures.
