On this page
Managing test submissions
How to allow an additional test attempt
If a student has completed a test but you need to allow another attempt, we recommend using the Ignore Attempt function on the student's original test submission. This retains a copy of the original attempt while allowing the student to start the test again.
- Navigate to Mark Centre
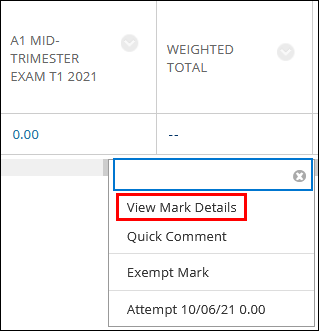
- Click the chevron in the cell corresponding to the student’s attempt, then click View Mark Details
- Click the grey Ignore Attempt button on the right-hand side

This should allow the student to begin a new attempt at the test, provided the test link is still visible in the course site. If the test link is no longer available to students, you can make it available for specific students using Test Availability Exceptions.
How to review the Test Access Log
Information about student activity in a test attempt can be viewed in the Test Access Log. To access the log:
- Navigate to your desired view of Mark Centre
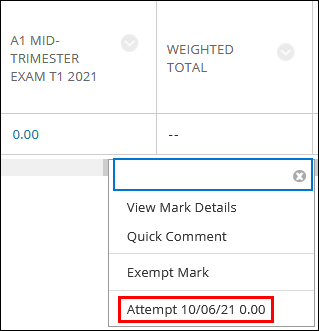
- Click the chevron in the cell corresponding to the student’s attempt, then click the Attempt… option
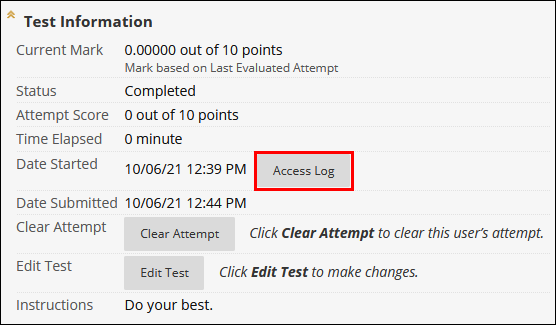
- Expand Test Information toward the top of the area
- Click the Access Log button
For further information on the Test Access Log, see Blackboard’s Test Access Log information.
Managing FAQs
There is a blue circle in the Mark Centre cell for a student's test submission. What does this mean?
A blue circle in a Mark Centre cell means that the student's test attempt is In Progress. Typically this means the student is actively taking the test, but in some cases, it means the student has saved their answers without submitting them.
If the student is still able to view the test link, they should be able to submit the attempt by accessing it via the link and clicking the Submit All Answers for Marking button. However, if the student is unable to view the test link, you can submit the attempt on behalf of the student:
- Navigate to Mark Centre
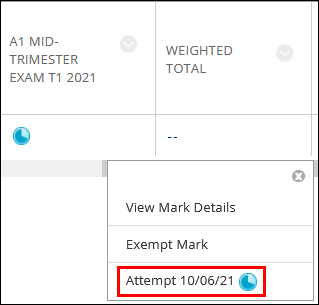
- Click the chevron in the cell corresponding to the student’s attempt, then click the Attempt… option showing the blue circle
- Expand the Test Information section toward the top of the page
- Click the Submit Attempt button
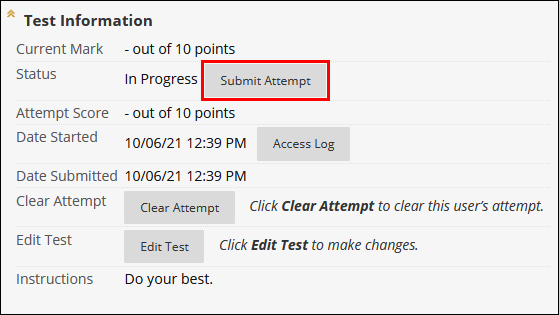
- Click OK to confirm
Marking test submissions
Automatic marking of test submissions
Question types with pre-defined answers, such as multiple choice or true/false questions, will be automatically marked by the system when the student’s attempt is submitted. If the entire test is made up of these question types, the attempt marks will be immediately visible to the instructor in Mark Centre.
Manual marking of test submissions
Question types without pre-defined answers, such as short answer and essay questions, require manual marking by the instructor. Marking for these questions can be done by attempt or by question.
How to mark test submissions by attempt
- Navigate to your desired view of Mark Centre
- Click the chevron in the cell corresponding to the student’s attempt, then click the Attempt… option
- Enter a mark in the box toward the top right of each question that does not yet have a mark
- Click Save and Exit when finished
How to mark test submissions by question
- Navigate to your desired view of Mark Centre
- Click the chevron in the test column header, then click Mark Questions
- Click the number in the Responses column on the right
- For random blocks, you will need to click Random Block under the Question Text column first to access the list of questions in that block
- Optionally, change the filter to Needs Marking so only questions that haven’t been marked appear in the list
- Please note that if a student has made multiple attempts at the test, responses from each of their attempts will show in this list regardless of what filters have been applied
- Mark each response for the selected question
- Click Edit in the top right corner
- Enter the required mark in the Score box
- Click the Submit button
How to release test marks and feedback
To release marks and feedback, simply unhide the associated Mark Centre column.
- Navigate to your desired view of Mark Centre
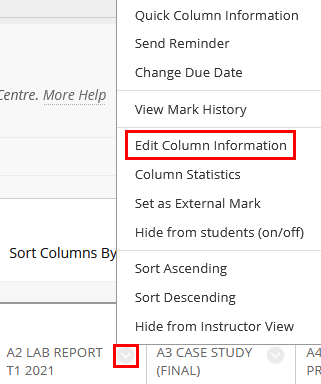
- Click the chevron in the column header
- Click Edit Column Information
- Scroll down to the Options section
- Set Show this column to students to Yes
![]()
- Click the red Submit button to save any changes
Marking FAQs
Students have submitted their test attempts but some attempts are showing as 'Needs Marking' in Mark Centre. How do I fix this?
If your test contains one or more questions that do not have a pre-defined answer, such as short answer or essay questions, all attempts will show as Needs Marking in the Mark Centre until all such questions have been marked. For instructions on how to mark these questions, see our information on manual marking of test submissions.
If all questions in your test have a pre-defined answer, such as multiple choice or true/false questions, and attempts are still showing as Needs Marking in Mark Centre, your test may have a Due Date enabled. If a Due Date is enabled on the test, any attempts submitted after the specified date will show as Needs Marking until each attempt is manually saved. Marks are still automatically calculated for these attempts, but for the marks to be committed to Mark Centre, you need to:
- Navigate to your desired view of Mark Centre
- Click the chevron in the cell corresponding to the student’s attempt, then click the Attempt… option
- Click the red Save and Exit button toward the bottom right of the page
Students cannot view certain test results or feedback after I have made the Mark Centre column visible. What do I do?
The information shown to students on the Review Test Submission page is determined by the Show Test Results and Feedback settings on the Test Options page. If students cannot view certain feedback types after the associated mark centre column is unhidden, it is likely that certain feedback options are not selected. To change these settings:
- In your Learning@Griffith course site, navigate to the assessment folder containing the test link
- Click the chevron to the right of the test title, then click Edit the Test Options
- Amend the settings under the Show Test Results and Feedback to Students section as required
- See Show Test Results and Feedback for information on what the different settings refer to
- Click the red Submit button to save any changes
Using Learning@Griffith site navigation
- Using Learning@Griffith for Staff
- Assessment Tools
- Tests
- Importing, Creating and Editing Tests
- Deploying and Configuring Tests
- Managing and Marking Test Submissions
- Tests
- Assessment Tools