Deploying tests
Test deployment refers to the act of creating a link to a test within a content area of your Learning@Griffith course site. To deploy a test:
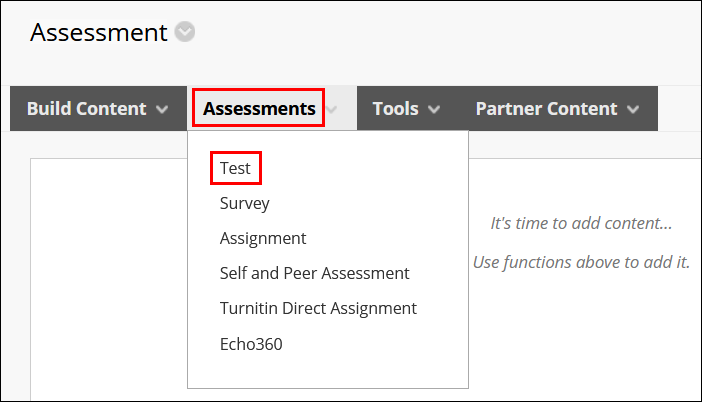
- Navigate to the assessment folder you would like the test link to appear in
- Hover over the Assessments tab at the top of the page, then click Test
- Click the test you want to deploy from the list so it is highlighted blue
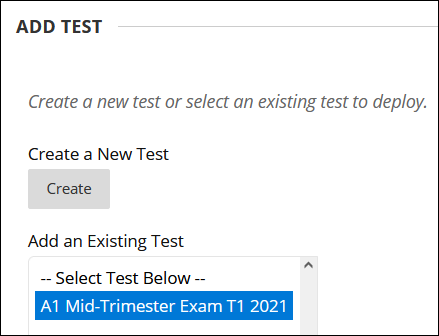
- Click Submit
Configuring tests
Once your test is deployed, you will need to configure the appropriate settings on the Test Options page. This page appears immediately after clicking Submit in step 5 of the deploying tests instructions. It can also be accessed at any time by navigating to the content folder the test is in, clicking the chevron to the right of the test title, then clicking Edit the Test Options.
Choosing the right settings is important in reducing the risk of issues occurring at exam time, such as the test not becoming available to students at the scheduled start time, or students having their work submitted prematurely. Exam Checker is available on the Test Options page to assist with configuring a test in line with our technical recommendations, and you can also refer to our information on recommended test settings for more detailed advice.
Exam Checker
Exam Checker is a tool designed to assist staff with configuring online exams in Learning@Griffith. It provides real-time feedback on important settings and presents suggested actions to bring them in line with those recommended for the optimal technical setup. For further information, see:
Recommended test settings
For the most efficient way to configure your test settings, we recommend using Exam Checker (see above). If you do not want to use exam checker, you can review the following recommended settings. Particularly important settings are emphasised with bold text.
Test information
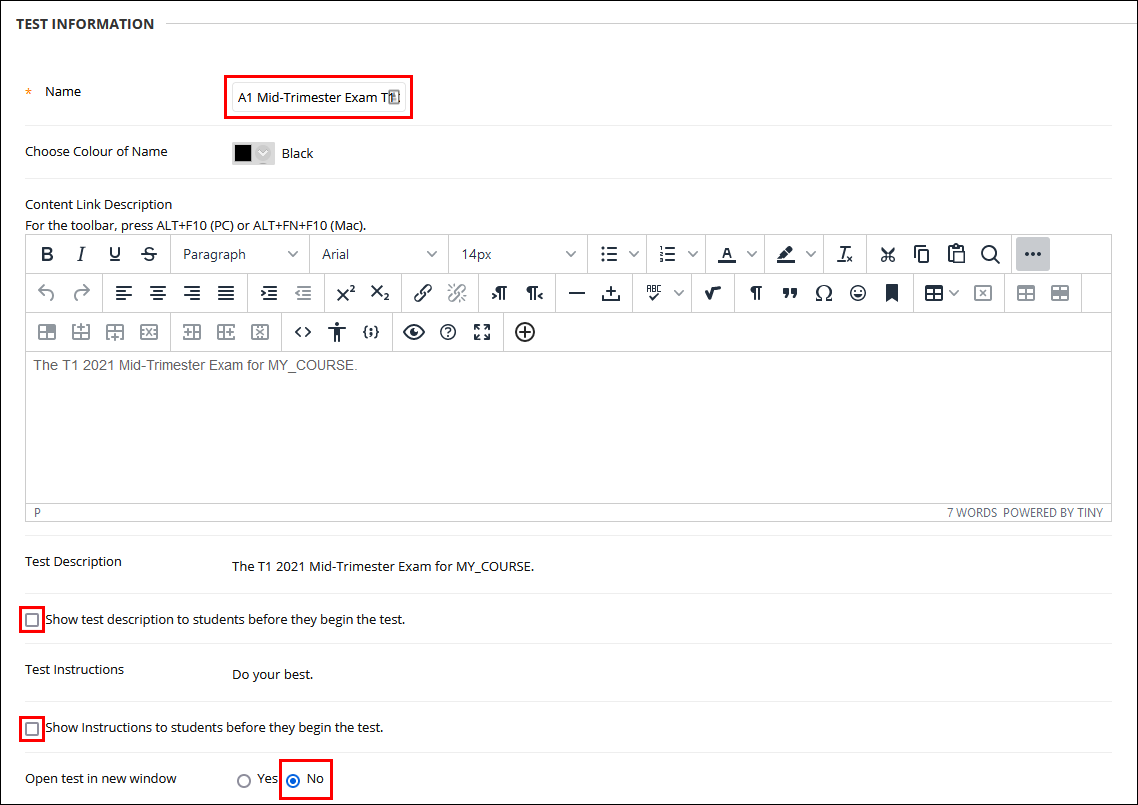
- Enter a name for the test in the Name box
- Text entered here will appear to students as the test link
- Optionally, provide text in the Content Link Description box
- Text entered here will appear below the link to the test
- If you entered a description when creating the test canvas, this box will contain that description by default. You can edit or remove any default text here as desired.
- If you entered a description and/or instructions when creating the test canvas, optionally tick the Show test description to students before they begin the test and/or Show Instructions to students before they begin the test
- These options will not appear if you did not provide instructions or a description when creating the test canvas
- Leave Open test in new window set to No.
Test availability
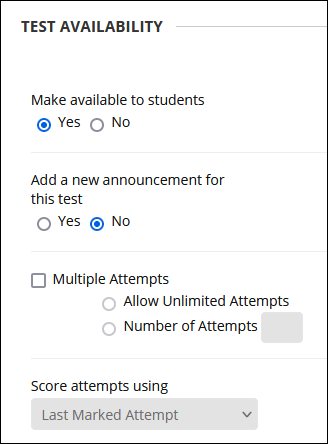
- Ensure Make Available to Students is set to Yes
- This setting refers to the overall availability of the test link
- This needs to be set to Yes for display dates to take effect
- If this is set to No, the test will not display to students, even if display dates or adaptive release rules with date criteria have been enabled
- Leave Add a new announcement for this test set to No
- Leave the Multiple attempts box unchecked
- If you are using the test as an electronic cover sheet, ticking the Multiple Attempts box and then selecting Allow Unlimited Attempts can be preferable. This way, if students make a mistake on their first attempt (for example, they submit the test without providing answers to the academic integrity questions), they can make additional attempts without teaching or support staff needing to take any action.
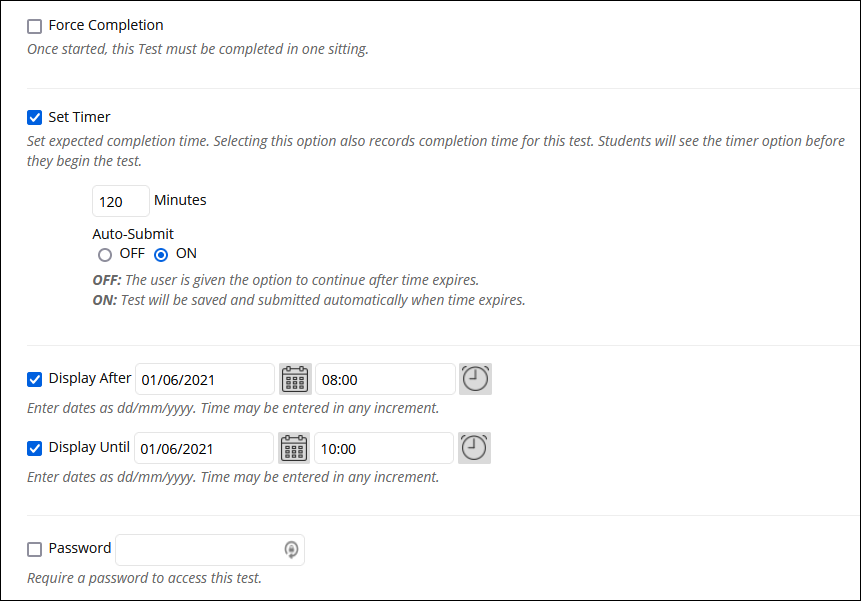
- Leave the Force Completion box unchecked
- If Force Completion is enabled, any slight disruption to internet connection or navigation away from the test page (whether on purpose or by accident) will submit a student's current progress immediately and prevent the student from returning to the test.
- To limit the amount of time students have to complete the test, we recommend enabling the Timer and setting Auto-Submit to 'ON' (see below).
- Tick the Set Timer box
- This enables a timer that will start counting down as soon as students click the Begin button on the test
- The timer will continue to count down even if a student navigates away from the test page
- Enter the desired time limit in the Timer box
- This is the number of minutes the timer will count down from
- Set Auto-Submit to ON
- This tells the system to automatically submit a student's attempt when the timer reaches zero
- Tick the Display After and Display Until boxes and enter the date and time you would like the test link to start showing and stop showing to students
- These dates can only take effect if 1) Make Available to Students is set to Yes (see step 1), and 2) the checkboxes are ticked
- Sometimes dates can appear in the relevant sections if the boxes are not ticked, rest assured these will not do anything unless the checkboxes are ticked
- Leave the Password box unchecked
Test availability exceptions
Test availability exceptions can be used to provide individual students or course groups exceptions to the availability settings entered in the previous section. Any combination of the following settings can be changed for each exception:
- Number of attempts
- Timer (and auto-submit)
- 'Display After' and 'Display Until' dates
To add an availability exception:
- Click the Add User or Group button
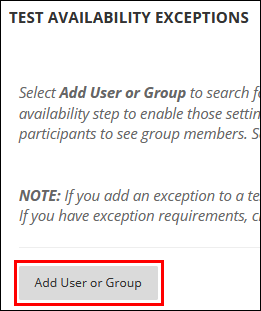
- Tick the boxes on the left to select the required student(s) or group(s) from the list
- You can also use the search function to locate a specific student or group. However, the list of selected students will be cleared when you click 'Go', so you may need to add the exceptions one-at-a-time if using the search function. When searching, ensure you use the Contains parameter as shown in the below screenshot.
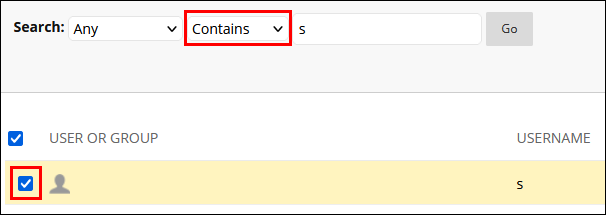
- Click Submit to add the selected student(s) and/or group(s) to the list of exceptions on the main page
- For student or group in the list of exceptions, change settings as required
- If any of the settings are unchanged, the settings entered in the Test Availability section will be applied. This is helpful for when only one setting needs to be changed. For example, you may want to give one student an extra 30 minutes on the timer but not change the Display After or Display Until dates.
- If you are providing an availability exception for a student who already has an attempt at the test, be sure to either a) ignore their attempt using our (link to ignoring test attempt instructions) guide, or b) change the number of attempts in their exception to Multiple Attempts and enter 2 into the box provided.

To delete an availability exception, simply click the X on the right, then click OK to confirm.
Due date
- Leave the Due Date box unchecked
- If Display After and Display Until dates are enabled, a due date is most likely unnecessary as the window in which students are able to access the test link is already limited, acting as a pseudo due date
- Setting a due date can cause extra work for the teaching team because any test attempts submitted after the due date show up as Needs Marking in the Mark Centre. If this occurs, an instructor would need to access each of these attempts and click Save and Exit to commit the marks to Mark Centre and remove the Needs Marking status.
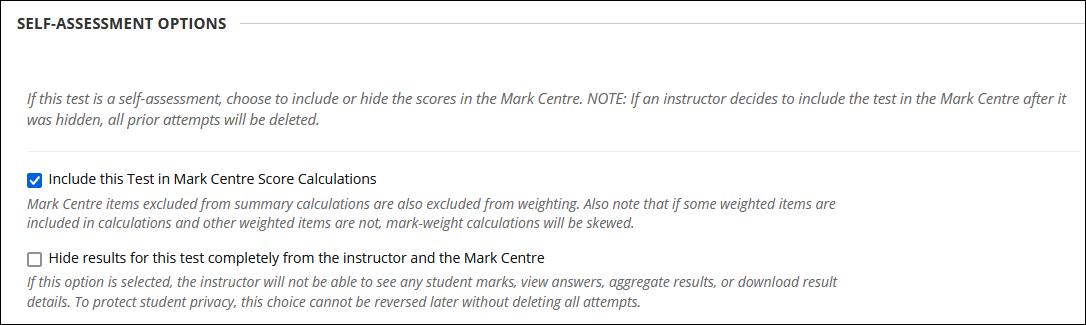
Self-assessment options
- Leave the Include this Test in Mark Centre Score Calculations box checked
- This ensures marks from the test are included (or at least available for inclusion) in any total columns in the Mark Centre
- Leave the Hide results for this test completely from the instructor and the Mark Centre box unchecked
- Leaving this box unchecked ensures the test attempts are available for marking in the Mark Centre. Conversely, if this box is checked, it completely hides all attempts from the Mark Centre, causing all student work to be inaccessible to instructors.
Show test results and feedback
- Under the When column, use the drop-down menu to select On Specific Date, then use the calendar and clock icons to enter the date you would like the marks and feedback to be visible on
- With theOn a specific Date option, the marks and feedback will only be accessible to students on the specified date if the associated Mark Centre column is also made visible to students
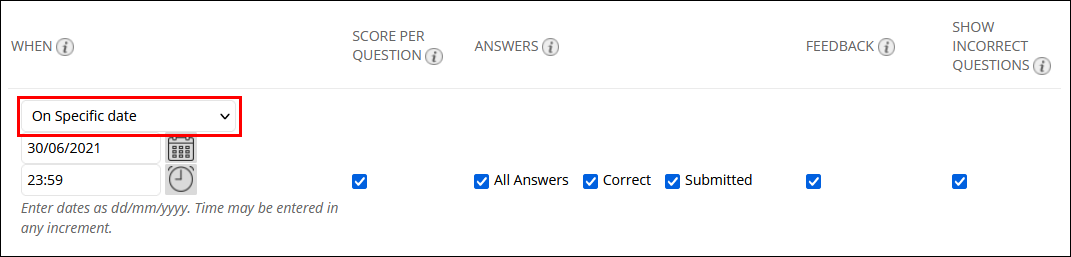
- Tick the boxes for the feedback types you want to show to students
- For an overview of what each feedback option refers to, please see the table on Blackboard’s Test and Survey Options support page
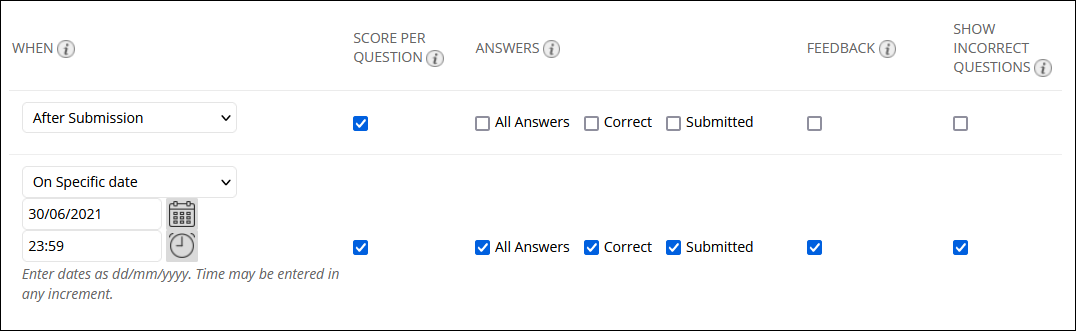
You can also release different results and feedback at different time points. For example, you may want to show students what score they received for each question immediately after submitting their attempt and then show more comprehensive feedback on a specific date once all students have completed the test. This could be achieved with the following configuration:
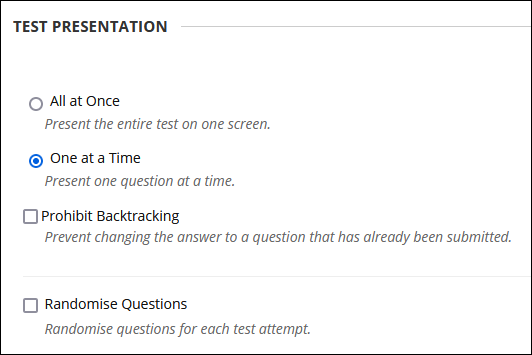
Test presentation
- Select the One at a Time bubble
- The one at a time question presentation can reduce the risk of rarer issues, including 1) loss of answers due to session timeout, and 2) text boxes not appearing, particularly for exams with a large number of short answer or essay style questions.
- Leave Prohibit Backtracking unchecked
- Leave the Randomise Questions box unchecked
- There is some evidence to suggest enabling the Randomise Questions feature can increase load on the system, which is why we have recommended leaving it unchecked
- If questions were injected into your test via Random Blocks based on pools, ticking this box is not necessary anyway, as the function of a Random Block already randomises the order in which questions are displayed to students
Save changes
- Click the red Submit button to save any changes made on the Test Options page
Other test support pages
- Tests (home page)
- Importing, creating and editing tests
- Deploying and configuring tests
- Managing and marking test attempts